Adding Syntax Highlighting to Blogdown Posts
November 15 2017 • 7 min read

The Backstory
I’ve been playing with Yihui Xie’s blogdown package for almost a year now, and I’m constantly amazed by all of the things that it can do. Maybe I’ll get around to turning this post into a series, with each addition explaining one more cool thing that you can now add to your blog posts from R. But, for now, there’s just one I’d like to touch on: syntax highlighting.
When I first began my blogdown journey, I didn’t think syntax highlighting was possible. I had started with this theme and any code I added to posts was just a solid color.
For example, when I typed code into an RMarkdown document in RStudio, it would look like this:
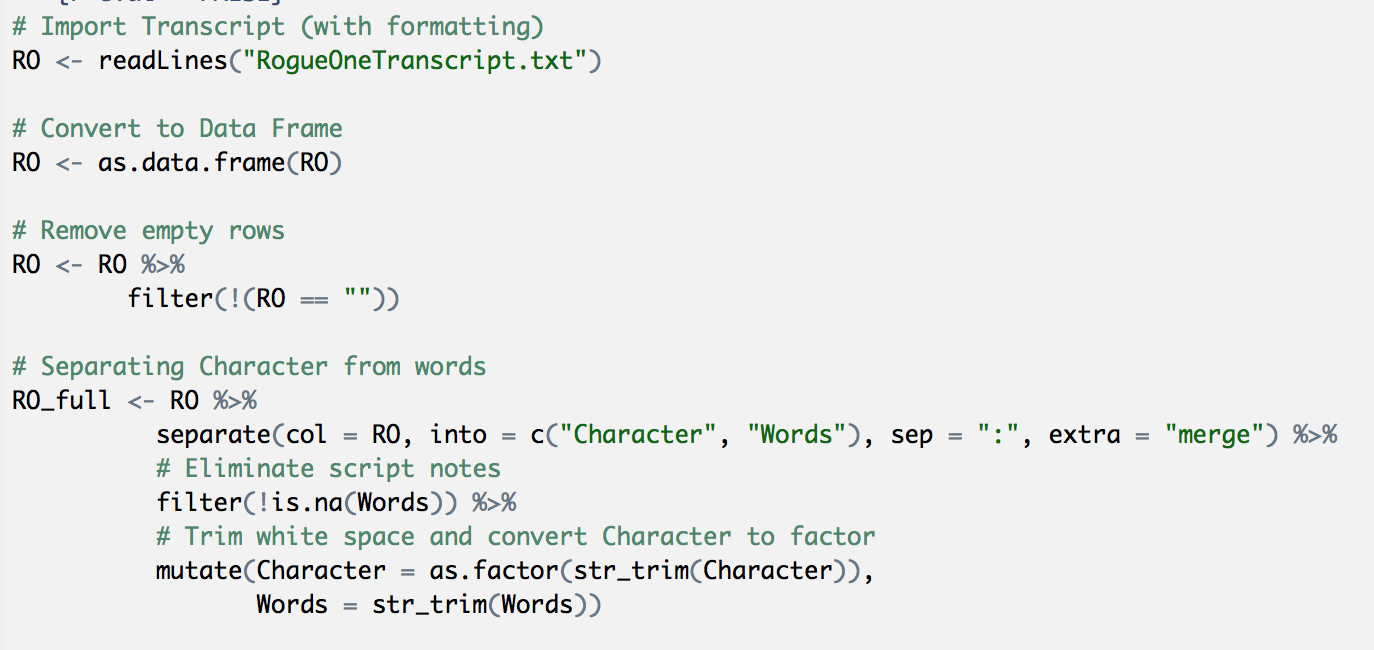
Figure 1: See how certain elements are colored?
but rendered on my website, it looked like this:
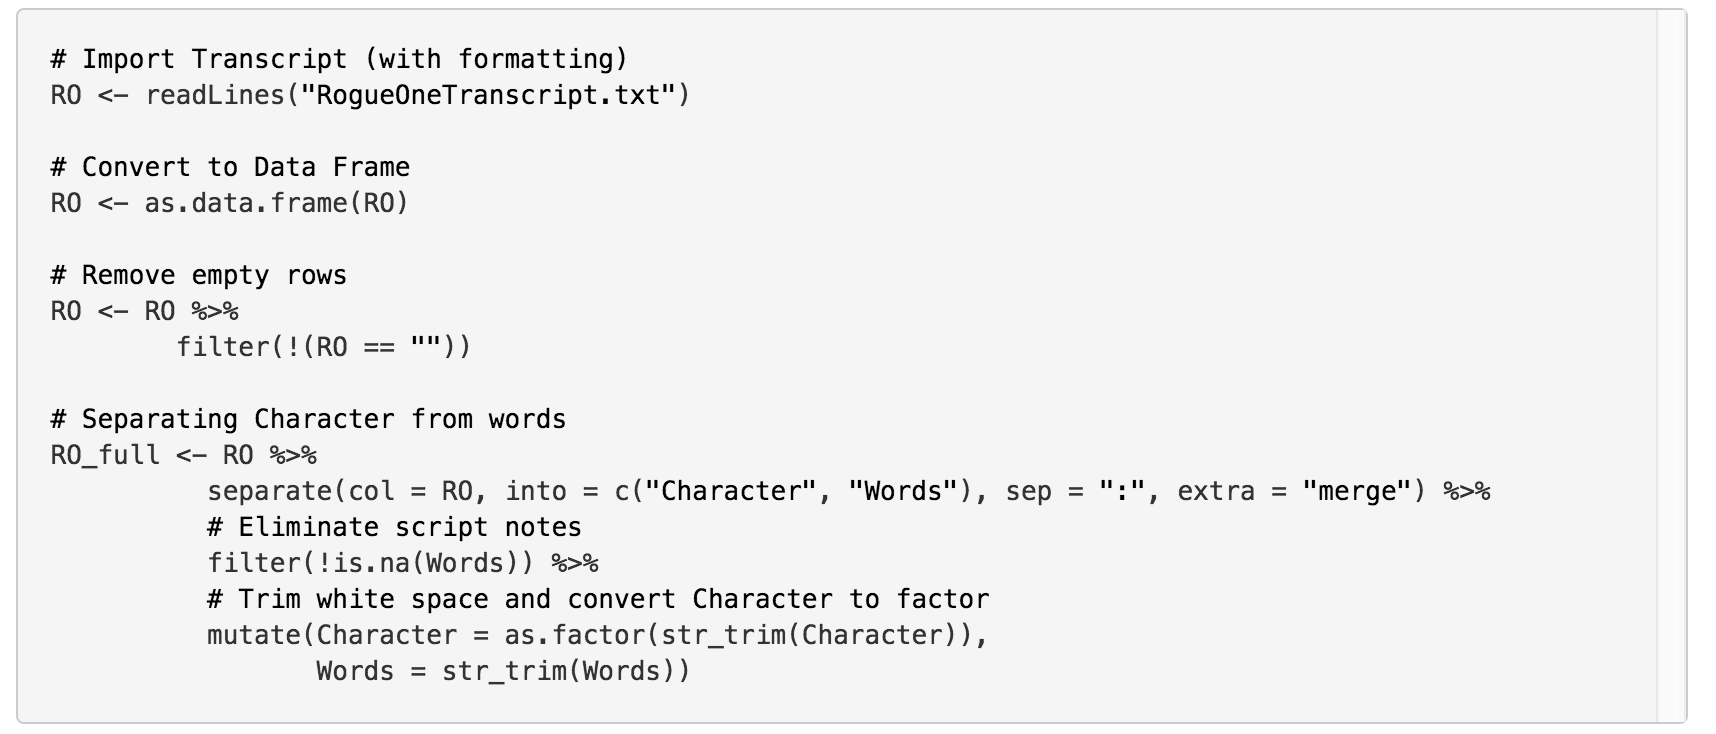
Figure 2: Boo, no colors
Ok, so, I recognize that this is mostly text decoration, but when you have very long chunks of code it is a little bit helpful to have certain parts colored. It also helps me quickly notice if I’ve made a typo.
Anyway, I thought this was just a blogging dream of mine until I was reviewing the blogdown book and stumbled upon this section which mentions the use of highlight.js, a javascript library that highlights the syntax of different programming languages. The blogdown book goes into more detail about syntax highlighting here, but I hadn’t given it a try until Mara Averick shared some tips for R blogging and this was included:
I finally decided to take the dive and after lots of code-tweaking and googling I got it working.
Here’s that same piece of code on my website now:
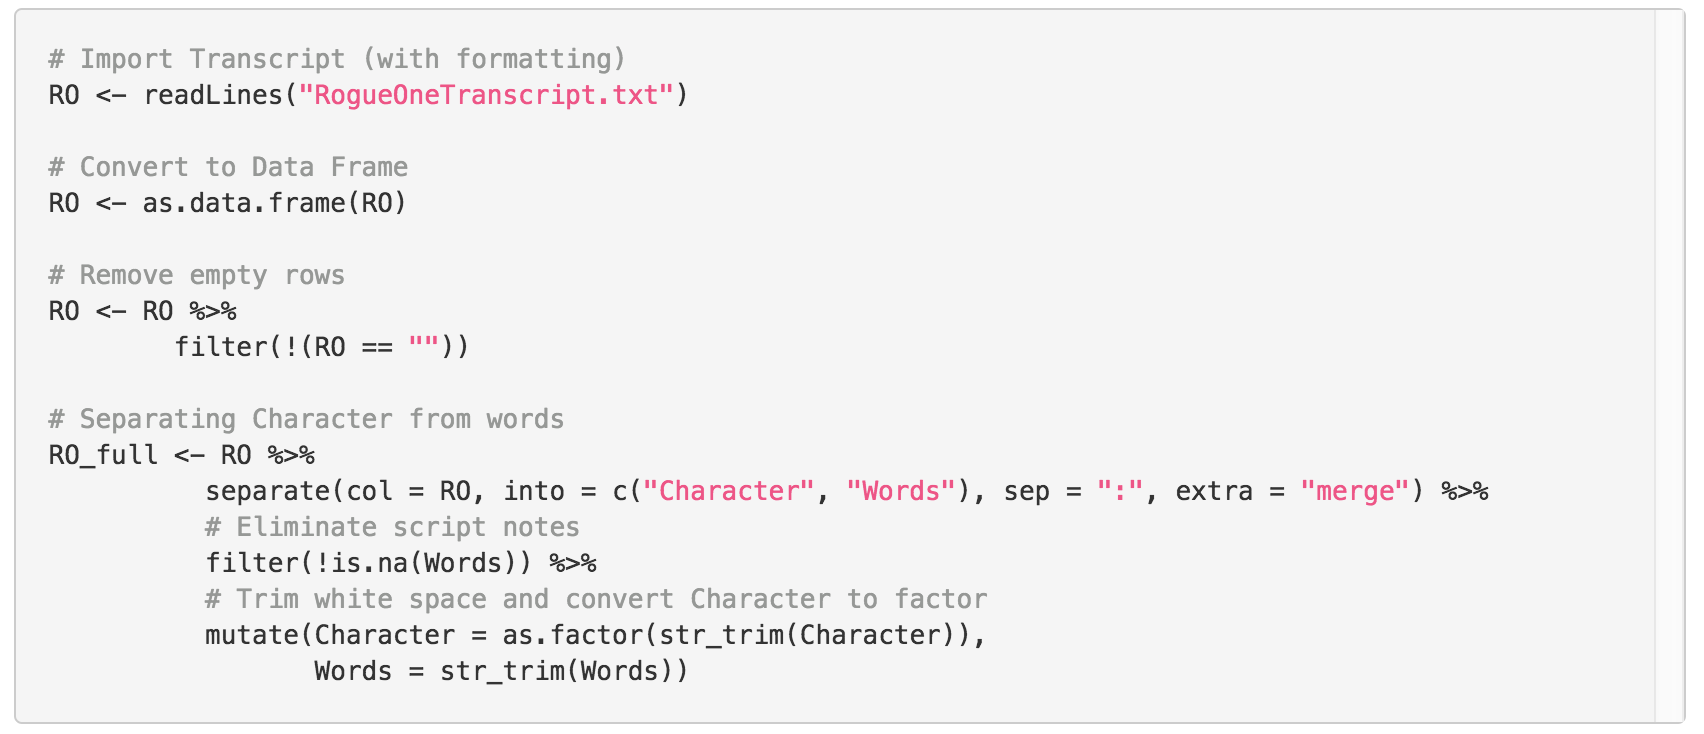
Figure 3: Yay, colors!
Alright, so how did I do it?
Step One: Check Your Theme
As it so happens, some Hugo themes already have highlight.js functionality built in. For instance, if you use the default theme within blogdown, you’re all set.
All you’d need to do is go to your config.toml file, and update this section:
[params]
    description = "A website built through Hugo and blogdown."
    highlightjsVersion = "9.11.0"
    highlightjsCDN = "//cdn.bootcss.com"
    highlightjsLang = ["r", "yaml"]
    highlightjsTheme = "github"
    MathJaxCDN = "//cdn.bootcss.com"
    MathJaxVersion = "2.7.1"
The highlightjsLang argument allows you to specify which languages you want to highlight, and the highlightjsTheme controls what colors are used to highlight (more options available here).
If, like me, your theme does not allow for highlighting out-of-the-box, keep reading.
Step Two: Add Highlight.js
There are several ways to add highlight.js to your blogdown site, but here’s the way that I did it.
- Go to the
highlight.jsdownload page. - Scroll down to “Custom Package” and select only the languages you plan to highlight on your site.
- Click Download.
- Unzip the folder and inside you should see several files. One of these should be
highlight.js. Copy only this file to the js folder for your theme (it should be located in themes/name-of-your-theme/static/js). - In the partials folder for your theme (themes/name-of-your-theme/layouts/partials), you should see a file called
head.css. Add the following code:
<link rel="stylesheet" href="{{"css/github-gist.css" | absURL}}" rel="stylesheet" id="theme-stylesheet">
<script src="{{ "js/highlight.pack.js" | absURL }}"></script>
<script>hljs.initHighlightingOnLoad();</script>- Almost there. See in the first line of the html code above where it says
css/github-gist.css? That is indicating that there should be a css file calledgithub-gist.cssin my css folder. The Github Gist theme is the one I am currently using fromhighlight.js, but again, you can select whichever one you want from here. Choose which theme you’d like and switch outcss/github-gist.cssforcss/my-favorite-theme.css(where “my-favorite-theme” is the theme you chose, of course). - Now we need to make sure that the css for that theme is in the correct place. Back in the folder that you downloaded and unzipped from
highlight.js, there is astylesfolder. Go in there, find the file that matches the name of the theme you want, copy that file, and paste it in the css folder for your theme (themes/name-of-your-theme/static/css).
Hopefully that will work for some of you! In my case though, there was more to be done.
Step Three: Blame Bootstrap
I had done the steps above, and my syntax highlighting still wasn’t working. I figured the next logical step was to figure out if there was some CSS leftover somewhere that was being used over my new highlight.js css file.
Here’s how I checked:
- I navigated to my website and opened up the developer tools (in Google Chrome you can do this by right-clicking on the page and clicking
Inspect). - Click the inspector tool (it looks like a mouse cursor inside of a box), and hover over elements on your website. You should see them lighting up various colors. If that’s working, click on one of the code boxes that should be highlighted.
When I do that, this is what I see:
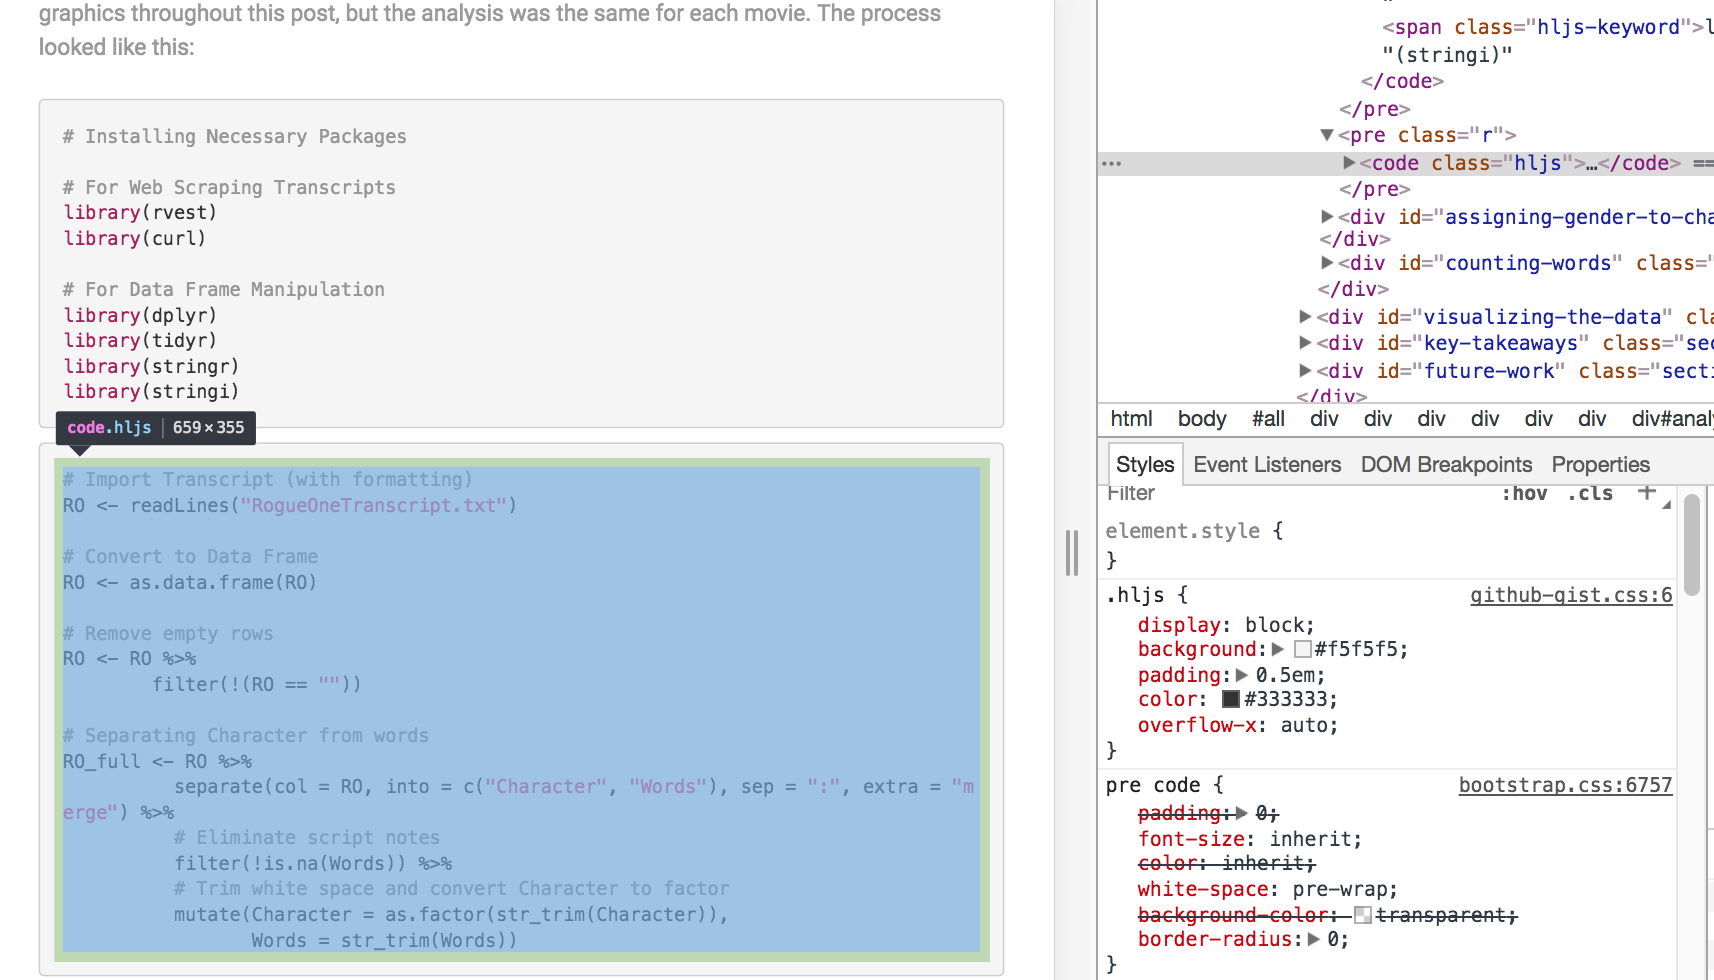
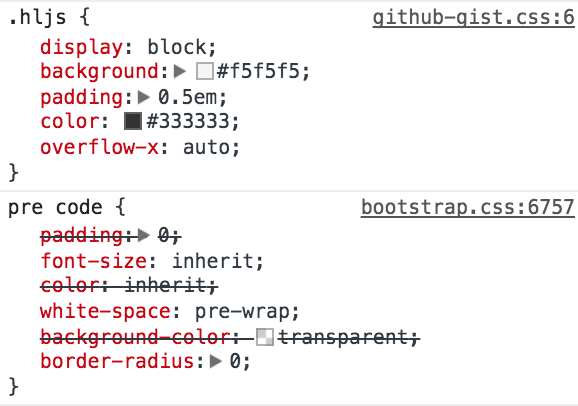
There’s a lot going on there, but focus on this part:
I accidentally forgot to take screenshots when I was having this problem, so these screenshots show what it should look like
Notice how items in the class hljs (written as .hljs) are being styled by github-gist.css and the elements pre and code (written as pre code) are being styled by bootstrap.css? Well, when I originally ran into this issue, there was no hljs class items, and all pre and code items were being styled by a file called code.less.
I spent forever searching for a file (both visible and hidden) named code.less that was messing up my syntax highlighting, but it was nowhere to be found. After much googling, I discovered that it is bundled in bootstrap.css which has been minified (i.e., all excess white-space and formatting has been removed, making it not very human-readable). This made it really hard to pin-point the issue, but luckily someone on StackOverflow had asked this question already. Essentially, the top-respondent suggested I had 3 choices:
- Option:1 Download the bootstrap source code less.css. modify the file and use it.
- Option:2 Place !important beside the css that you want to override in your custom.css
- Option:3 Go to developer tools identify the portions of less.css which you want to override and use your own id with those elements. After that style them in your own css file.
After lots of playing around, option 1 seemed like my best bet…sorta. I decided to download a new bootstrap.js and bootstrap.css file without the code.less file bundled in.
- You can do that by going here and under “Common CSS”, uncheck the box that says “Code”. I had no idea what other files had been changed between this version of
bootstrapand the one used in my theme, so I left everything else untouched. - Click “Compile & Download”.
- Warning: you are about to replace some of your theme’s js and css files, I’d recommend copying these to a safe location until you see if you will need to undo this step Unzip the folder, and move the “bootstrap.min.js” file to the js file of your site (themes/name-of-your-theme/static/js) and the “bootstrap.min.css” file to the css folder of your site (themes/name-of-your-theme/static/css).
- Serve your site using
blogdown::serve_site()and see if your syntax is working (For some of you, I assume, it should be).
At this point, my syntax highlighting was, indeed, working (🙌 🎉), but the layout of my page was a little messed up. That makes sense, as I had replaced the CSS file that ran my site. I decided to put my original bootstrap.min.js and bootstrap.min.css files back in their original locations which fixed the layout but my syntax highlighting was gone again. Here’s what finally got it working with my theme:
- Open the
bootstrap.min.cssfile in your text editor and copy all of the text into an unminifier (I used this one) - Copy the output into a new file in your css folder (themes/name-of-your-theme/static/css) called
bootstrap.css. - Search that doc for any instances of
preorcodeand find the chunk that has the background-color and text color that your theme is currently generating displaying. In my theme, it looked like this:
pre, code, pre code,  {
    padding: 2px 4px;
    font-size: 90%;
    color: #c7254e;
    background-color: #f9f2f4;
    border-radius: 4px
}
All I needed to do was remove any instances of pre from this. So it now looks like this:
code {
    padding: 2px 4px;
    font-size: 90%;
    color: #c7254e;
    background-color: #f9f2f4;
    border-radius: 4px
}- Save the file
- In your
header.htmlfile, you should see a line that looks something like this
<link rel="stylesheet" href="{{ "css/bootstrap.min.css" | absURL }}">just remove the call to the minified version and save
<link rel="stylesheet" href="{{ "css/bootstrap.css" | absURL }}">- Serve your site using
blogdown::serve_site()
And that’s it! This may not work for every theme, but hopefully I hit walls frequently enough to keep you clear of them. Now go enjoy your colorful code 😄